I bought a used tandem just in time for our 27th wedding anniversary in May, 2005. I decided I wanted to try a tandem when I realized that it’s more about communication and teamwork than about technical cycling skills. I’ve been getting frusrated riding regular bikes with Odette because I have to wait so much.
I got a blue 1998 Burley duet made by a workers co-op in Eugene. It’s in really good shape and I got it for a fair price from an ad in Craigslist. The guy who sold it to me had just gotten a new one. He bought this one new and said he rode it about 300 miles a year. He had done two STPs on it and several Apple Cup rides. He seemed pleased that somebody else was going to get pleasure from his bike and he volunteered to take Odette and me out for our first rides. (We didn’t take him up on it because Odette was scared to ride with anyone but me – preferring a total novice to someone who had been riding tandems for at least seven or eight years!)
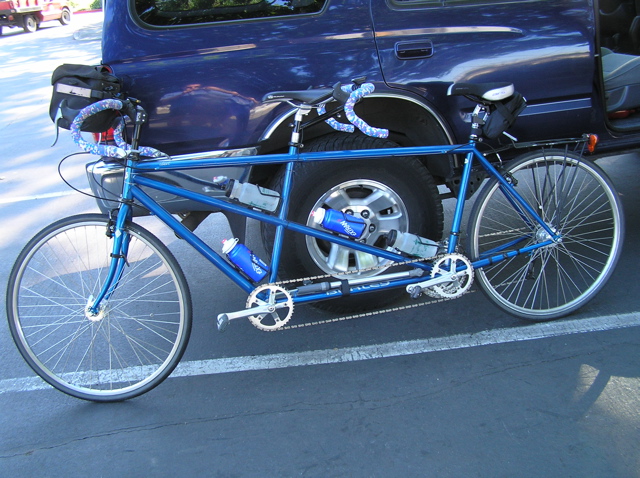
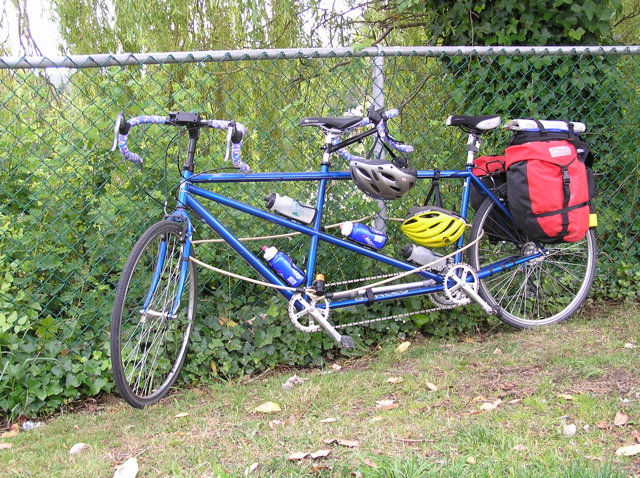
I took his aero bars off and added a wedge bag tool kit and a taillight from REI. I stole pedals from our mountain bikes and ordered replacements on Ebay. I bought a Cateye Astrale cyclometer on Ebay (along with a long-wire harness) and installed that on the stoker bars because it matched the one Odette knew from her touring bike. I bought a couple of different stoker bags and a KlickFix mount so that we could attach her handlebar bag. (That later got changed to a TwistFix mount.) Here’s what it looks like:
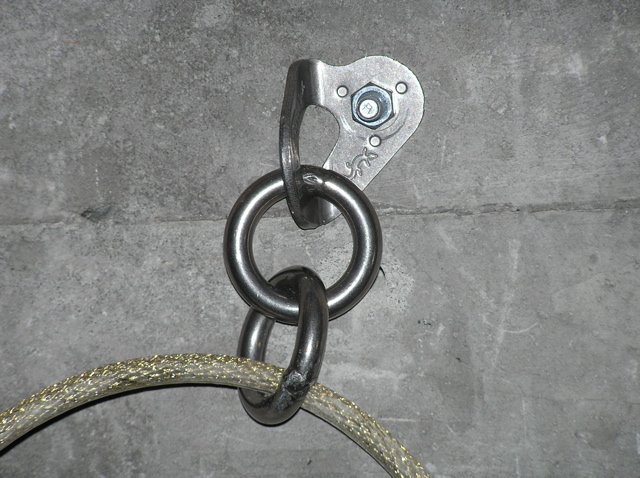
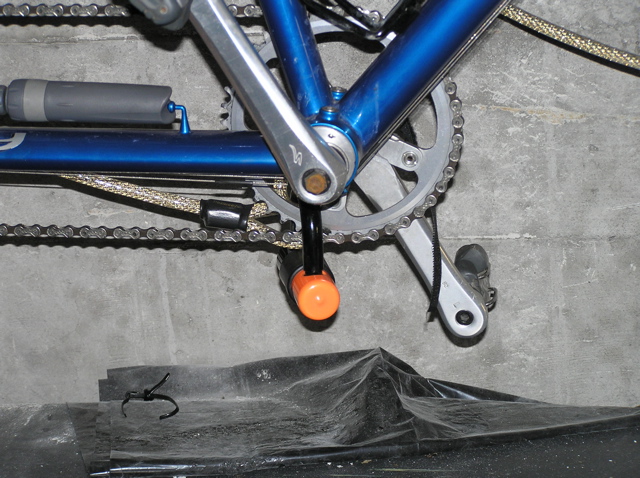
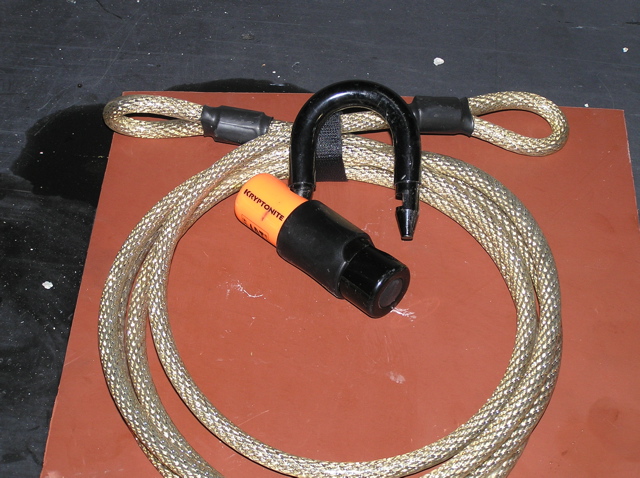
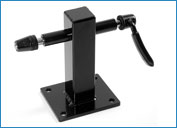
I bought a couple of wall-mounted bike hangers and bolted them to the garage wall with quarter-inch bolts and cement anchors. I added a three-eighths inch anchor and bolted on a hanger with welded links so that I could thread a heavy cable through. I bought a kryptonite disk lock on ebay which fits the front chainring. This set-up may be overkill, but it immobilizes the bike even if the cable is cut, it’s light enough to carry on a tour, and the lock alone would be difficult to defeat. Here are photos of the lock and anchor:
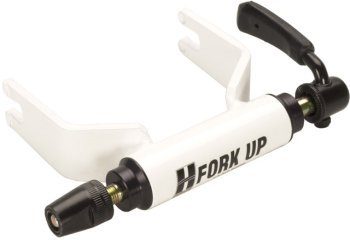
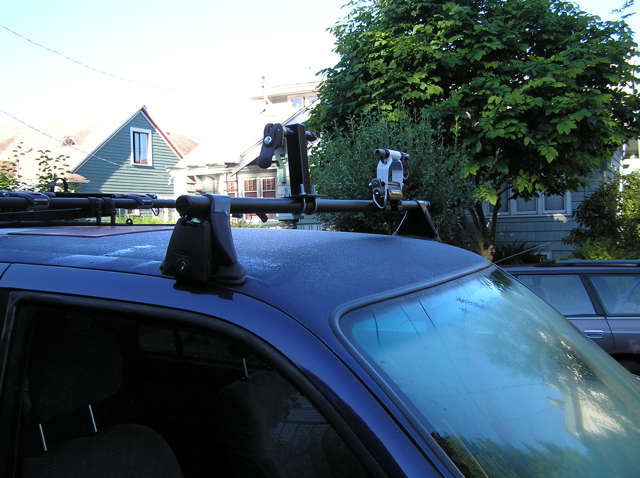
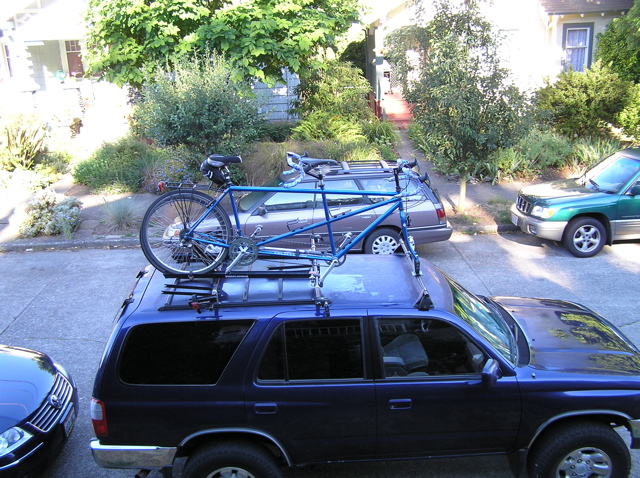
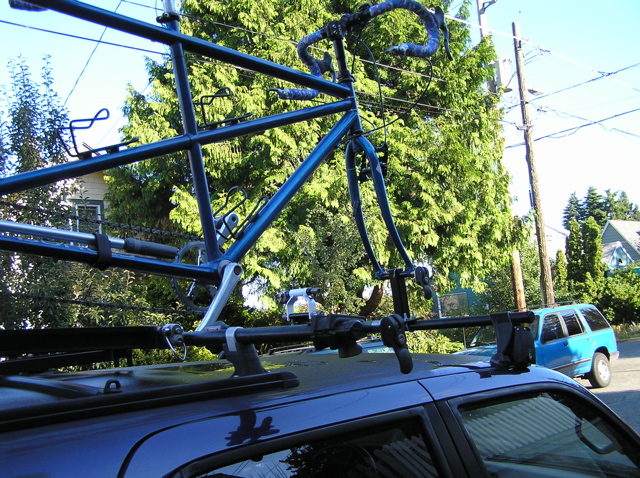
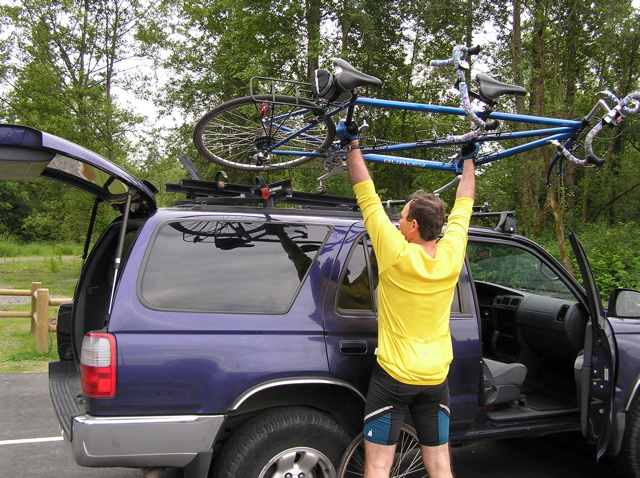
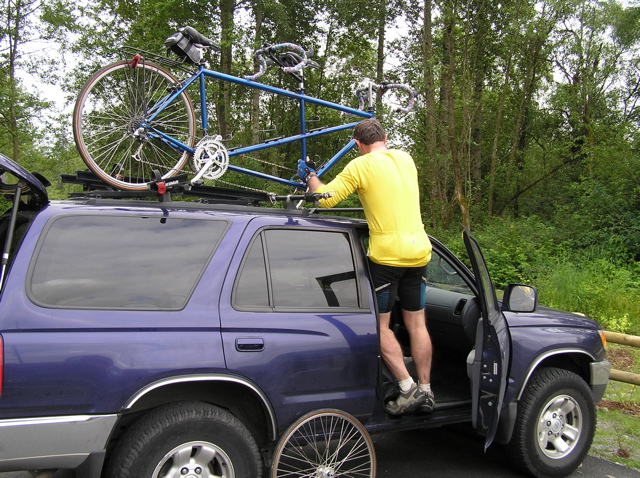
I bought an additional Yakima bar and two clamp-on towers that I mounted all the way forward on the car. I bolted on a fork clamp like you’d use in a pickup bed. The rear tire goes in one of the single carriers already up there. I bought the head of an old-style short tray carrier and a lock to go over the nut to make it more secure, intending to use it to replace the clamp. However, that head mounts with a single bolt which isn’t enought to keep the weight of the tandem from rotating it – and the bike is already so low that the cranks hit the roof. After scratching the roof badly when I kind of dropped the bike with a pedal in the down position, I decided to use the head to replace one of the two already on the car for single bikes and I bought a “fork up” riser (intended for bikes with front disc brakes) that clamped into the Yakima block. (I also bought a piece of rubber to protect the roof while loading and unloading.) The riser worked to get the chain ring up off the roof of the car, but the skewer holding the riser rotated. I traded the steelhead style skewers from the short-tray fork blocks for the new locking skewers I’d bought and I drilled a hole in the riser so that the pins on the steelhead skewers would keep them in place. It appeared to work but it wasn’t an elegant solution. My ultimate solution was a one-piece fork riser from Tandems East. I had to drill four holes in the aluminium so that I could attach it to the bar with pipe clamps and I’m concerned that the extra height will act as enough of a lever to rotate the bar itself. It has worked so far, though, and it makes getting the bike loaded much easier. (I put the same cores in all three skewers and in the two towers so that I only need one key to mount the bar on the roof and the bike on the bar.) The forward bar causes a lot of wind noise at low speeds so I plan to only mount it when I’m going someplace with the tandem on top – meaning that the set-up needs to be self contained and can’t be braced against another bar to prevent rotation. As it is, the carrier holds one or two tandems totally stable and it seems a whole lot simpler than the $400 pivoting gizmos the shops want to sell. Here are photos of the roof rack:

UPDATE – with a new car I broke down and bought one of those “$400 pivoting gizmos” – only it cost more than that before I got done – and I’m really happy with it.
We went out early on a showery Sunday for our “maiden voyage” on the tandem. We rode the interurban trail in Kent to where it intersects with the Green River trail and then back on the river dikes to Tukwilla and the interurban – 22+ miles. We were wobbly at the start but we figured it out pretty quickly. Odette was panicked about crossing roads and going between the trail-head gate posts, but she eventually relaxed a little. I wasn’t able to get the cyclometer that came with the bike to work. I felt like I was working much harder than on my single. Odette dismounted and walked across one street and I realized that the bike was much lighter without her. I also felt like I was fighting her a lot when I tried to line up to go between trailhead posts. We returned to the same route for our second ride and it was noteworthy only for me locking my keys in the car and for Odette never figuring out how to get her new cyclometer out of kilometers. Our third ride was longer but still a safe choice as we rode the Centennial Trail south from Arlington to Snohomish and back – 36 miles. On the way back we counted the gates & posts and determined that there were 36 pairs of barriers to navigate on a one-way ride. (It was on this ride that I scratched the top of the car with one of the pedals as I was loading the tandem for the ride home.)
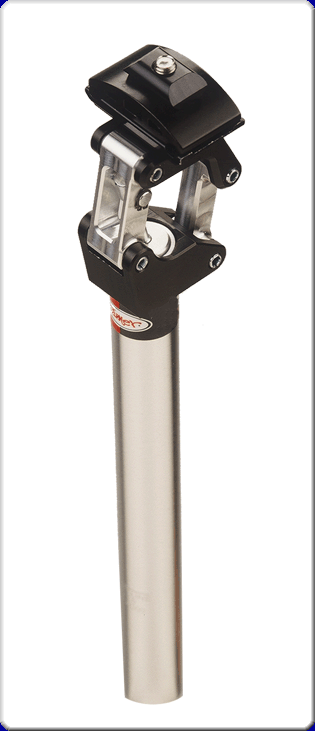
We took the Burley in for fitting at R+E cycles and decided to go with narrower handlebars and a new stem clamp that puts the bars closer to the saddle for me, and a Tamer “trickey dick” suspension seat post and new saddle for Odette. Including a complete tune-up, new cables and bar tape, and some miscellaneous stuff (like a frame pump) the fitting and parts cost almost exactly as much as we paid for the Tandem. I considered it a Fathers’ Day present. Unfortunately, the repair shop was backed up and couldn’t promise to have it done for two weeks.
That meant we got it back just in time to take it on a long weekend tour in the
Gulf Islands, followed six weeks later by a weekend in Concrete. The first season we put just over 500 miles on the tandem. By the end of the summer I think we had it figured pretty well. I certainly understood that Odette didn’t like to go fast downhill. She had figured out that she always needed to get off on the same side. We definitely go faster on the tandem than when Odette is by herself. We also stop less. We have the starting ritual down pat – the next thing we have to work on is staying centered over the bike and leaning into turns.
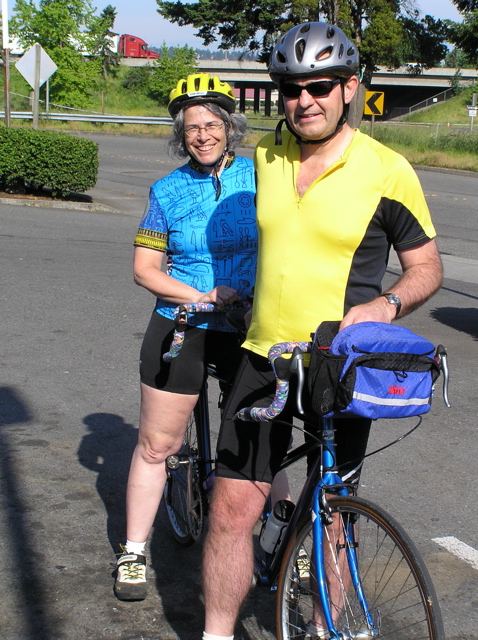
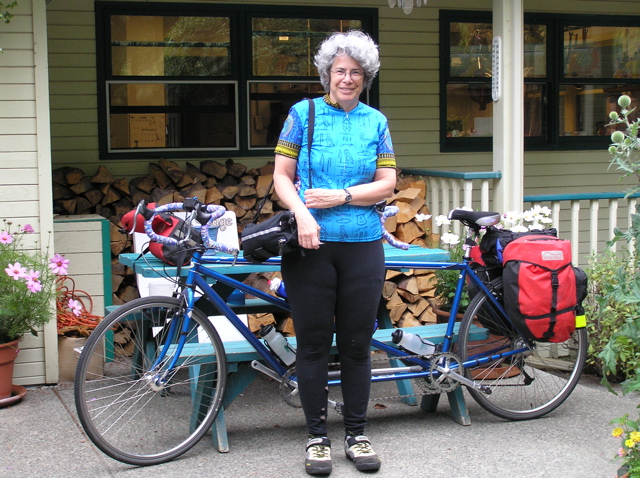
Here are a few photos.
Here are some rides to try as you start out on a tandem.
Here are some basic tandem links.
Santana “why tandem” page
Evergreen tandem club
divorce bike
tandem technique (from Rodriquez)